Check for darkness before you look for the aurora
When checking an aurora forecast, it is easy to start with the Kp index or cloud cover. But if you are planning an aurora trip to a polar region, there is one condition to check first: whether your viewing location actually gets dark. Even with strong solar activity and clear skies, the aurora is difficult to see when the Sun never sets.
Most well-known aurora destinations are at high latitudes, where the length of day and night changes dramatically with the seasons. Summer brings polar day and white nights, while winter brings polar night or very short daylight hours. When choosing dates for an aurora trip, you need to ask not only “Will the aurora be active?” but also “Will the sky be dark enough when I am there?”
1. Why is the aurora difficult to see during polar day?
During polar day and white nights, the Sun does not travel far enough below the horizon for the sky to become fully dark. The aurora can still occur, but its light is overwhelmed by the bright sky, making it practically impossible to see from the ground. Even if the forecast shows a high Kp index or a promising aurora probability, it will not become a real viewing opportunity without darkness.
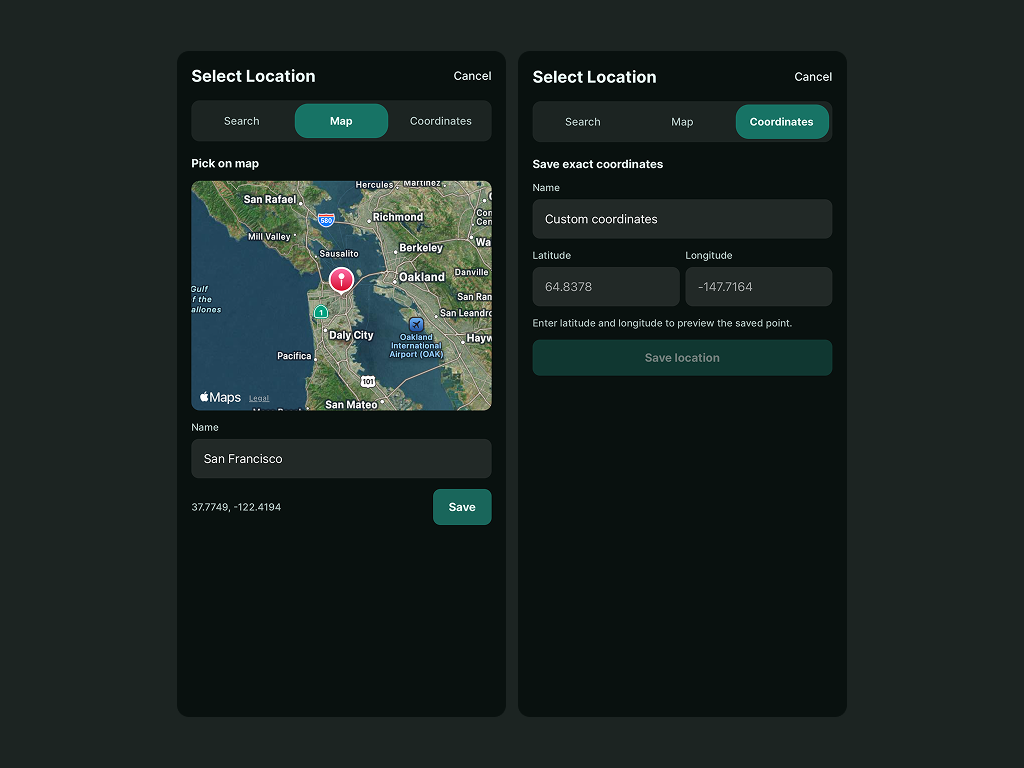
It is especially easy to choose the wrong dates when you rely only on a general sense of the seasons. Polar day and white nights begin and end on different dates depending on latitude. Instead of planning from a city name alone, check how the hours of darkness change through the year at your exact selected location.
2. Polar night creates a better aurora season
Polar night is the period when the Sun does not rise above the horizon, or daylight becomes extremely short. With more dark hours in each day, you naturally have more time to wait for the aurora. Given the same level of solar activity, a long polar night gives you more opportunities than a short night.
Polar night does not mean the aurora will appear every day. You still need to check the Kp index, Ovation probability, cloud cover, and local weather. Think of polar night as the condition that creates a strong viewing environment, while space weather and Earth weather determine whether it is worth heading outside on a particular night.
3. Check annual darkness to choose your travel dates
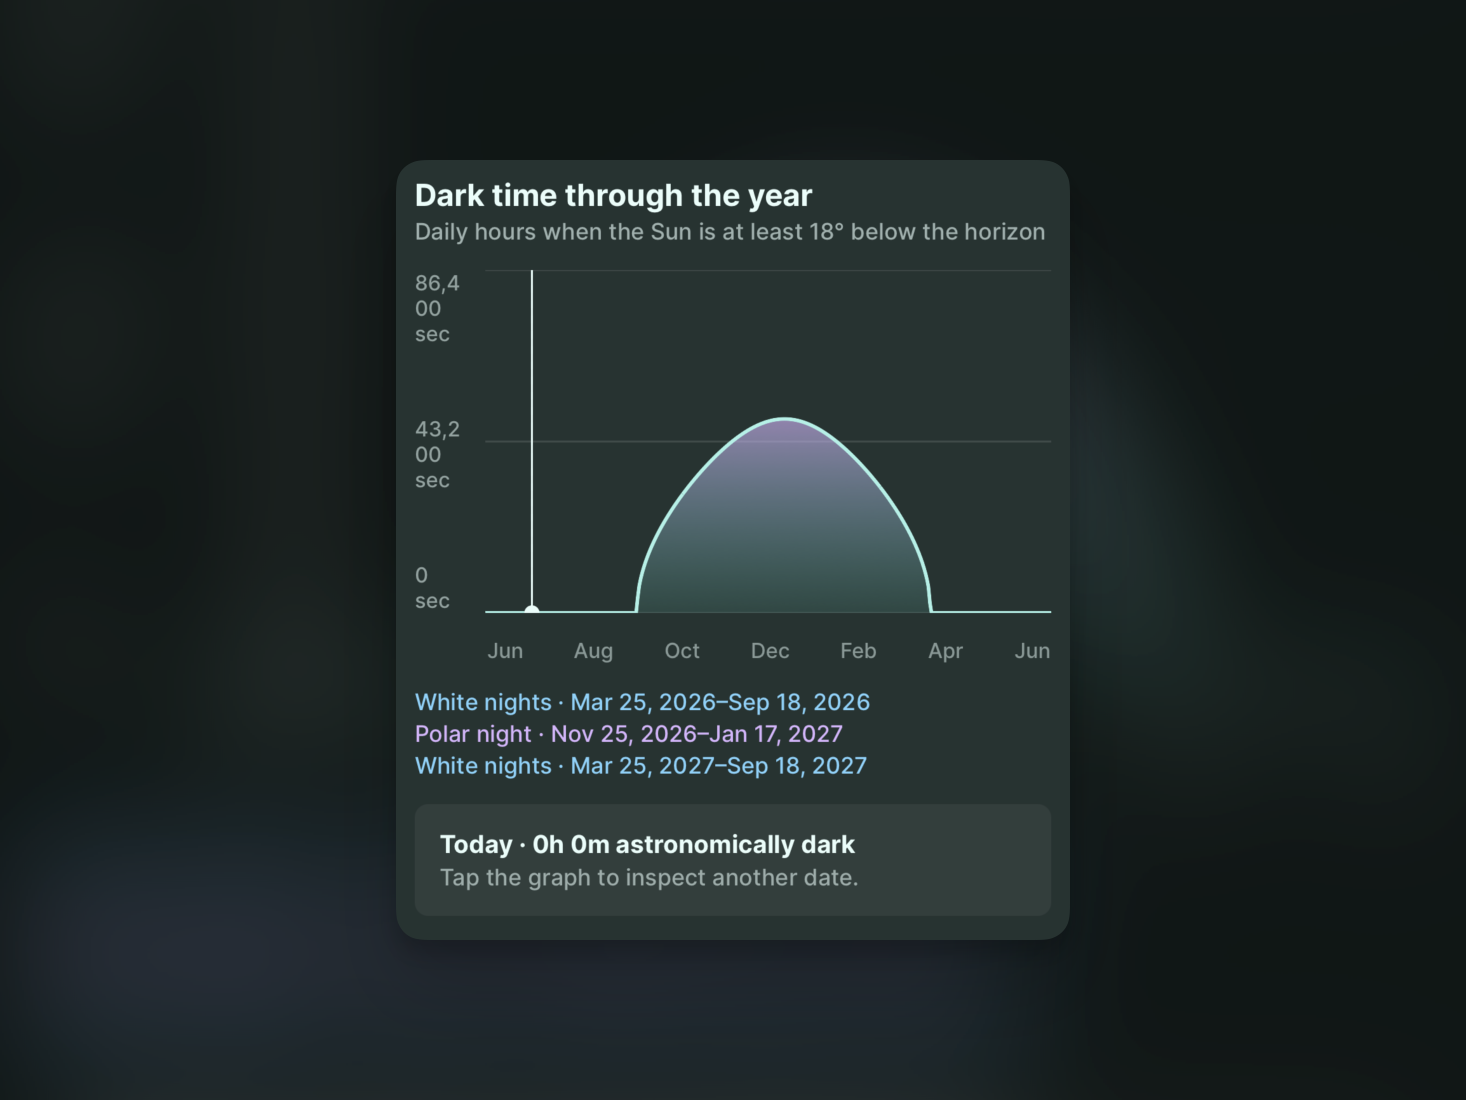
Aurora Eos shows how the hours of darkness change across an entire year for your selected location. Instead of relying on a rough sense of months or seasons, you can see when darkness returns to your destination and how quickly the nights become longer.
The graph shows the hours of astronomical darkness, when the Sun is at least 18 degrees below the horizon, for each date. A period where the curve stays near zero has no time when the sky becomes fully dark. As the curve rises, the number of dark hours available for aurora viewing increases. The start and end dates of white nights and polar night appear below the graph, so you can immediately see where your potential travel dates fall.
- First, check whether your potential travel dates have enough dark hours.
- Just after white nights end, the night may still be short, so check the actual viewing window as well.
- Darkness changes quickly around the beginning and end of polar night. Compare several dates before finalizing your itinerary.
- If you have several saved viewing spots, compare their annual patterns to find the better season.
This is more useful than simply assuming that “winter is best.” Places at different latitudes, such as Tromso, Yellowknife, and Reykjavik, can have very different amounts of darkness on the same date. Checking the exact location gives you a much more realistic travel plan.
4. See how long remains until polar day or polar night
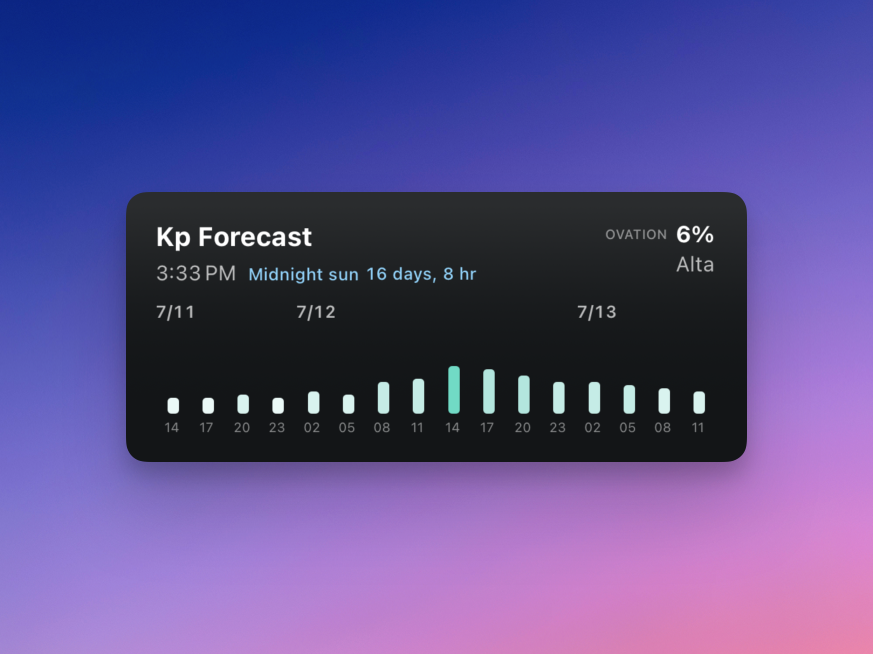
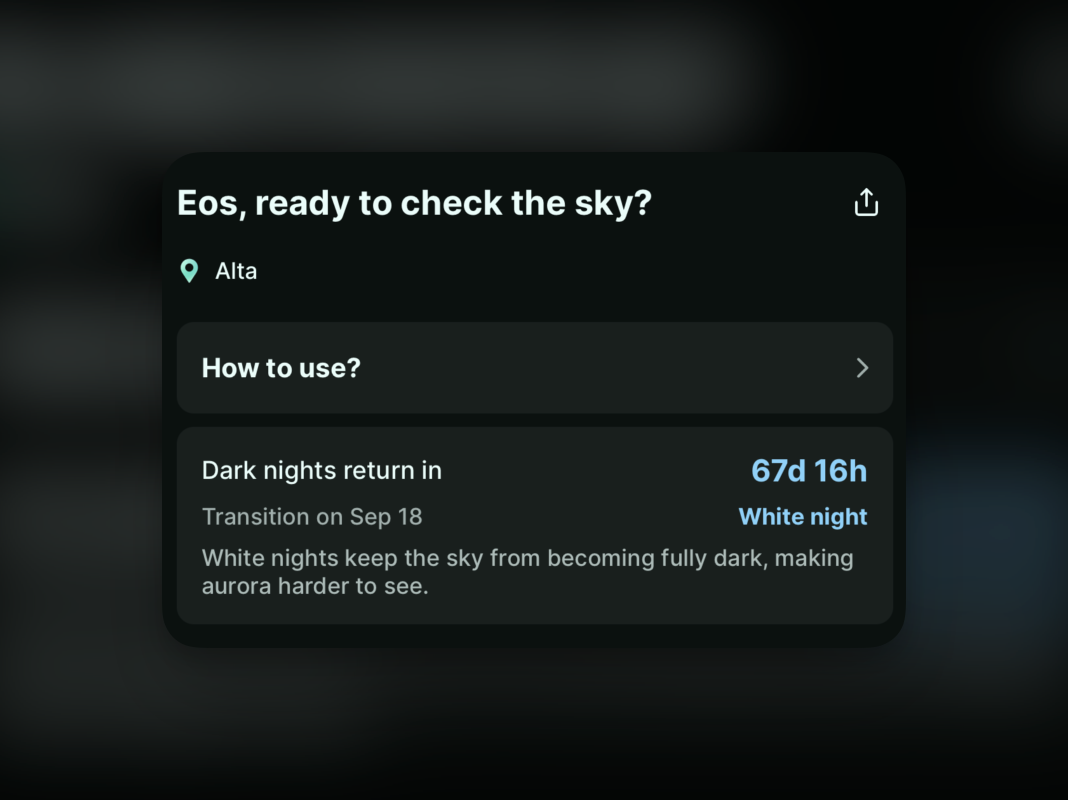
You do not need to calculate every seasonal change from a calendar. On the Aurora Eos home screen and widget, you can check the time remaining until the next polar day, white night, or polar night transition for your current location or a saved viewing spot. It helps you quickly understand where you are in the viewing season and whether the hours of darkness are increasing or decreasing.
The widget shows the current seasonal state and the days and hours remaining until the next transition alongside the Kp forecast. During white nights, for example, you can see exactly how long it will be until dark nights return. Rather than viewing aurora activity in isolation, you can judge on the same screen whether the season is dark enough to see that activity.
As the aurora season approaches, use the widget to track the remaining time and adjust your travel dates and gear preparation. Once the season begins, keep checking the aurora forecast in the same widget. This connects “When should I start preparing?” with “Should I go out tonight?” in one simple routine.
Keep the widget on your home screen, even outside aurora season
When white nights begin, you do not need to forget about Aurora Eos until the following winter. Keep the widget on your home screen and casually watch the darkness return. The next viewing season will not feel as if it arrived without warning. Simply glancing at the remaining time whenever you check your phone gives you a clear point of reference for planning the next aurora trip.
Start by using annual darkness to choose the broad timing of your trip. Then track the time remaining until white nights or polar night from the home screen and widget. Once the season begins, check the Kp index, Ovation probability, and cloud cover together. I hope Aurora Eos becomes the tool that stays with you from the bright nights of summer until the moment you meet the aurora again.